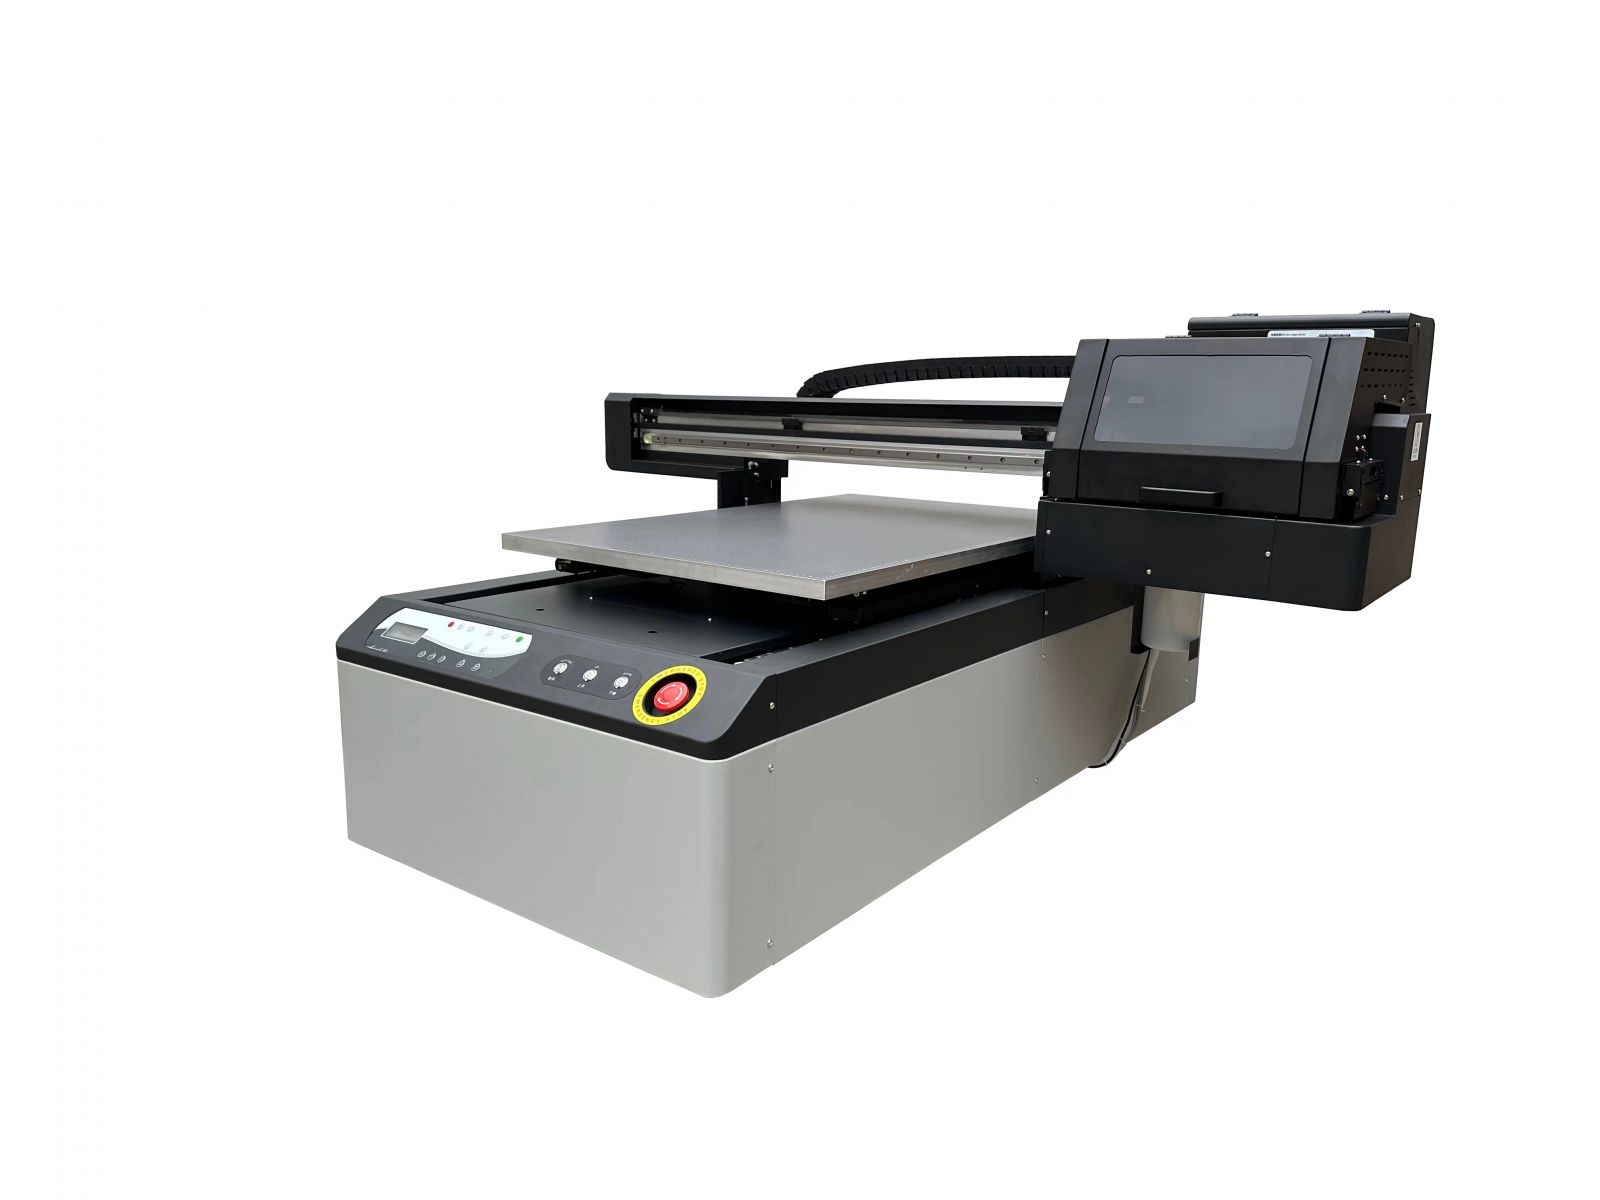
Máy In Led UV Phẳng 60 x 90
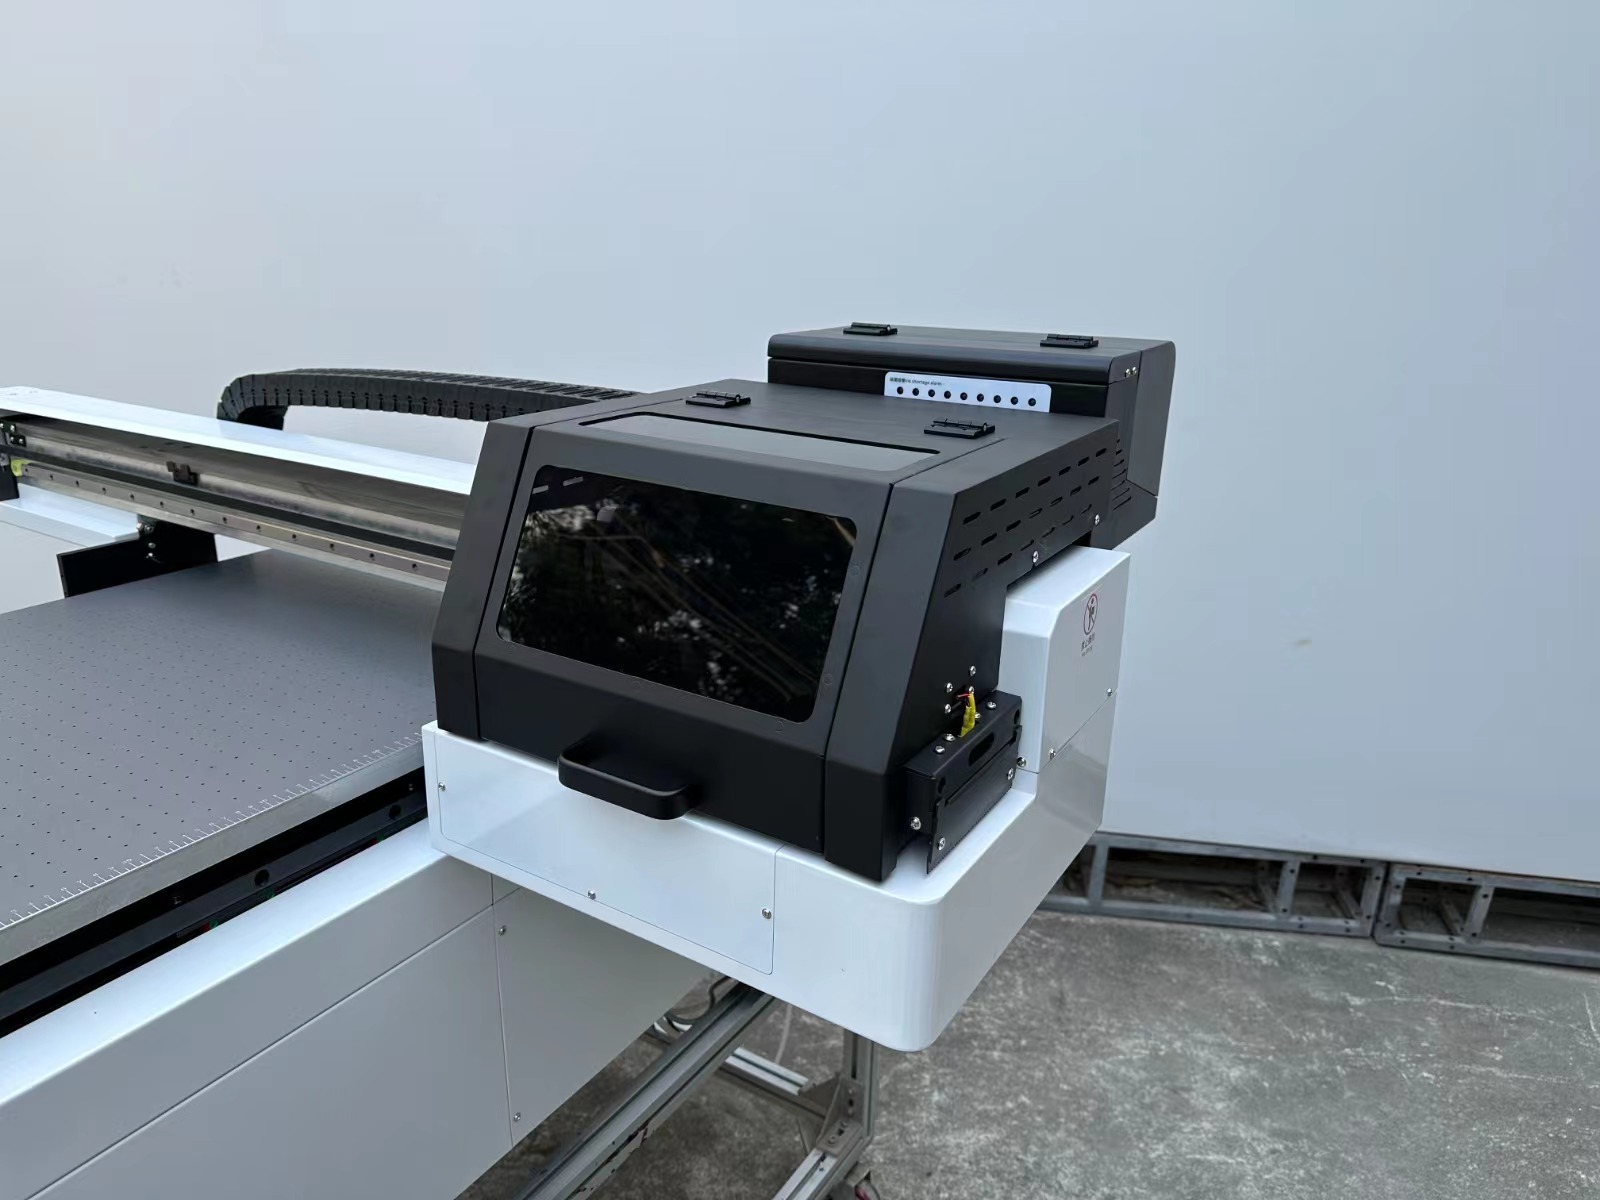
Máy in phẳng 2 đầu phun XP600 khổ 60cm x 90cm
Hàng đặt theo yêu cầu của khách _ thời gian giao hàng 15 - 20 ngày _ giá bán theo thời điểm đặt hàng _ zalo 0983726554
Thông số Máy in phẳng 2 đầu phun XP600 khổ 60cm x 90cm
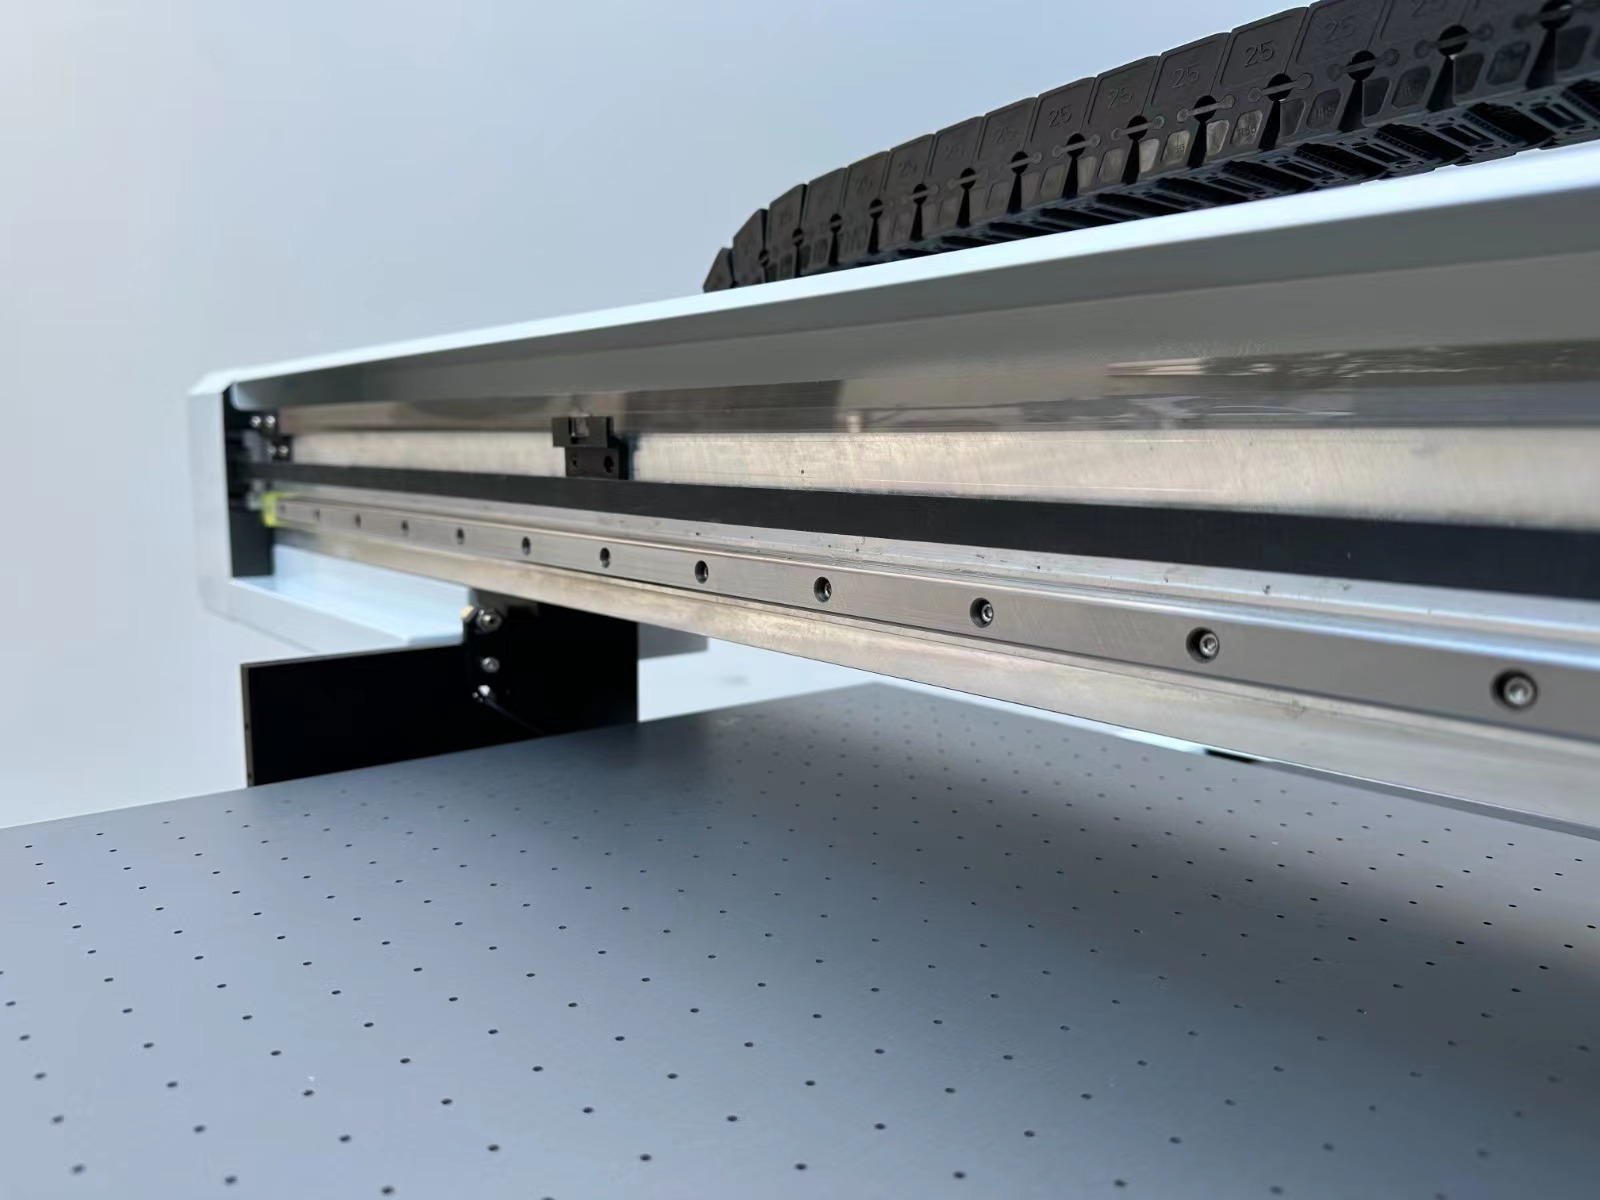
- Máy in phẳng khổ in 60cm*90cm
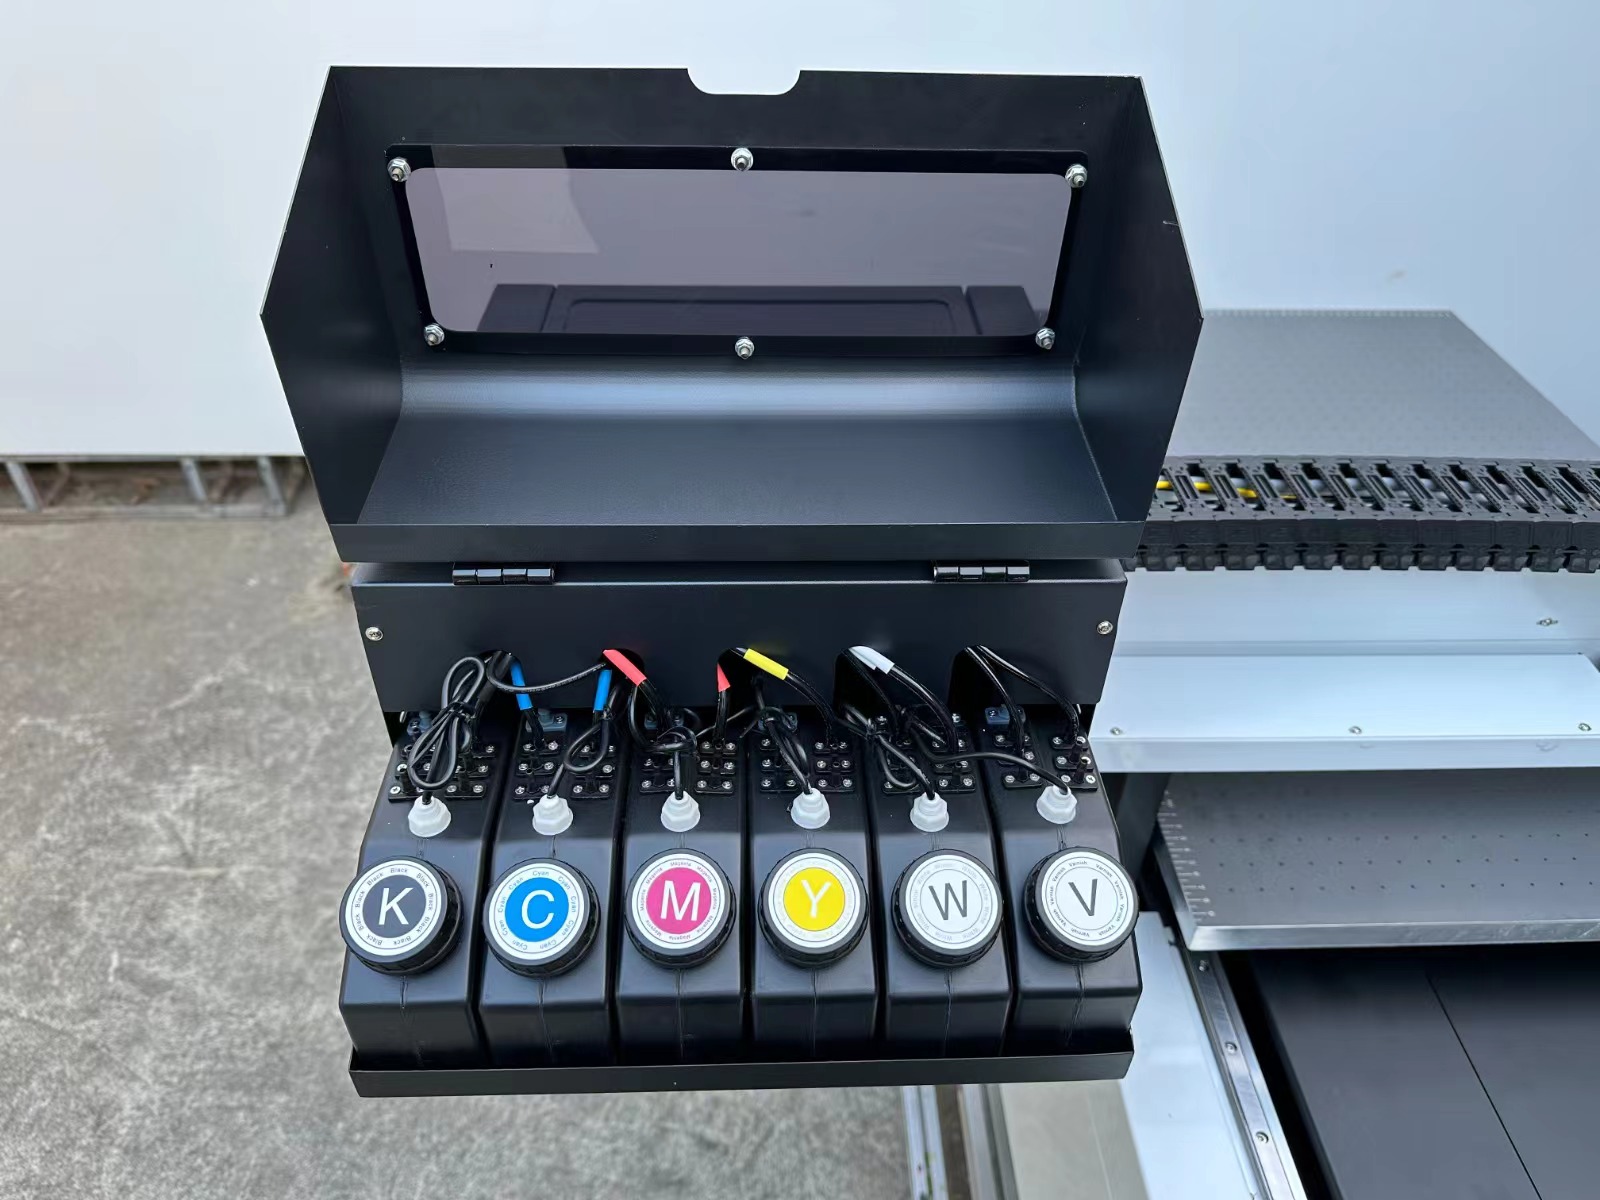
- Dùng 2 đầu phun xp600 với hệ màu : CMYK LM LC và 6 W
- Dùng hệ mực Led UV tương thích đầu phun Epson Desktop L805 - L1800 - TX800 - XP600
- Độ phân giải 2160 dpi
- Khổ máy in : 1630*1585*910cm
- Điện thế 220v - Trọng lương máy 200 kg
- Hệ thống làm nguội bằng nước
- Phần mềm điều khiển MainTop
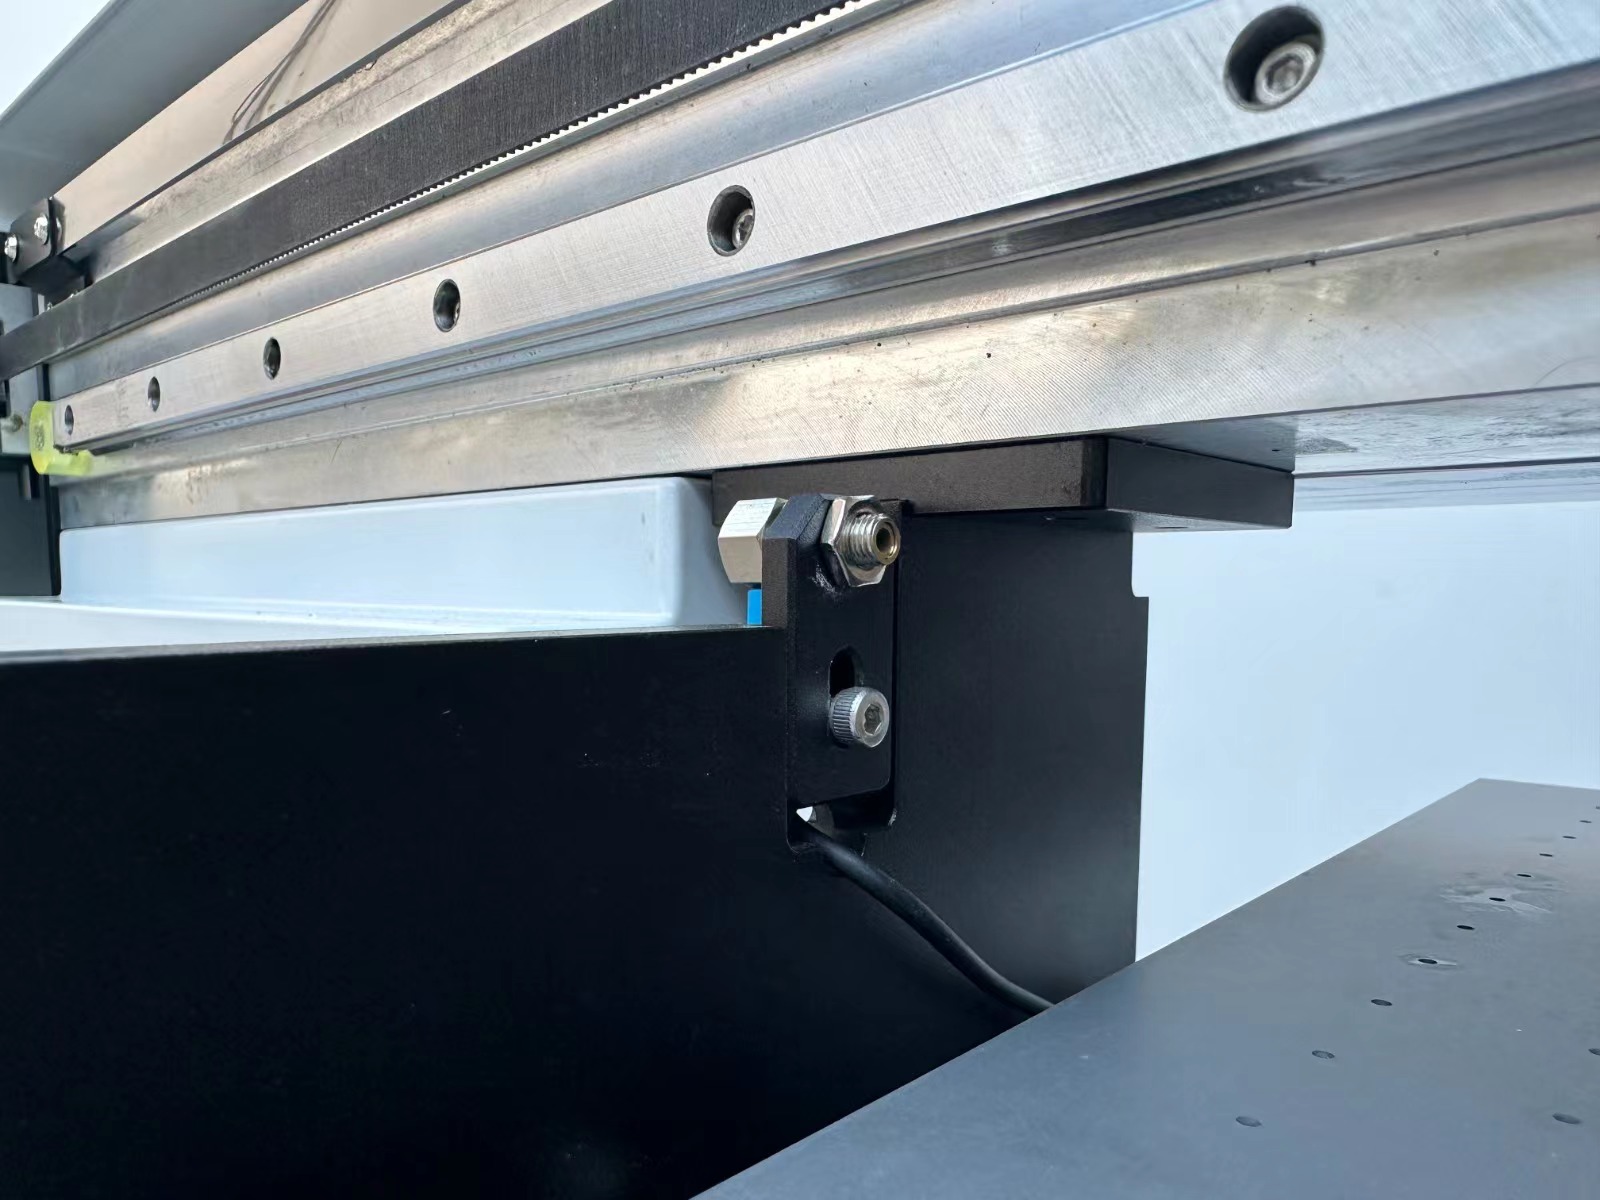
- Khoảng cách bàn và đầu phun có thể in 10cm
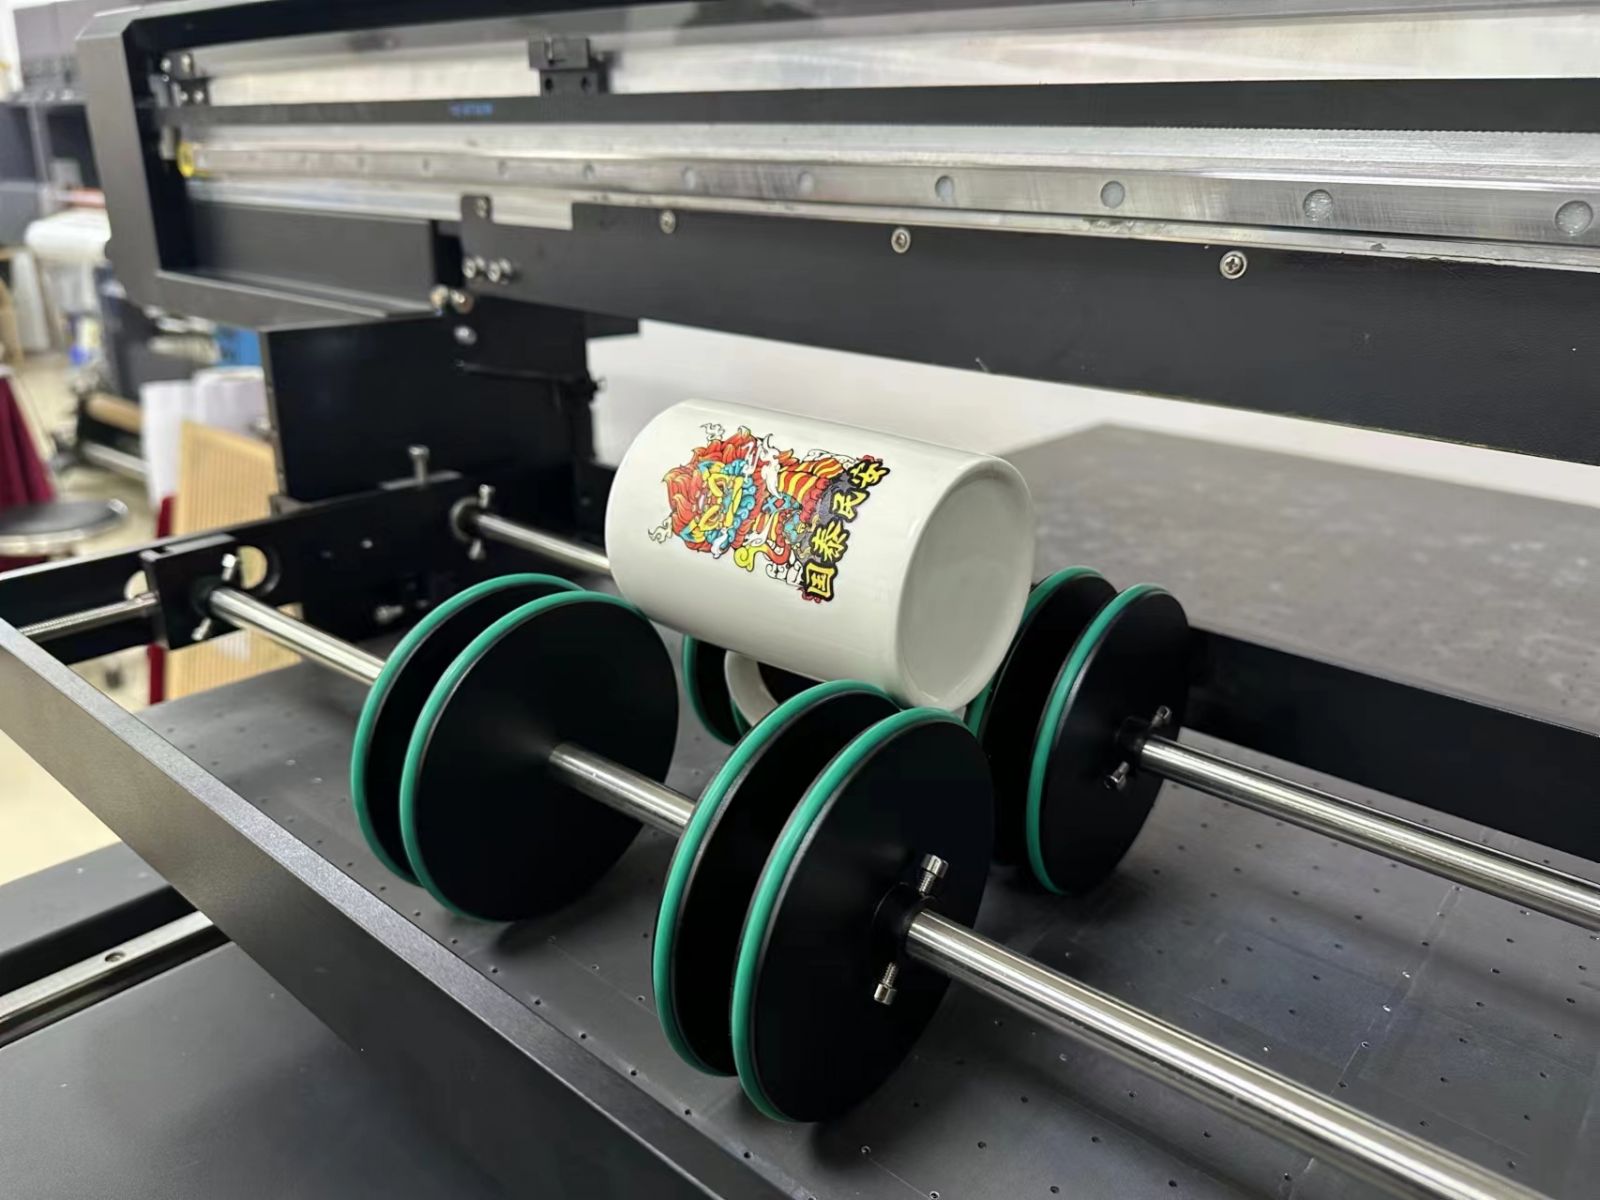
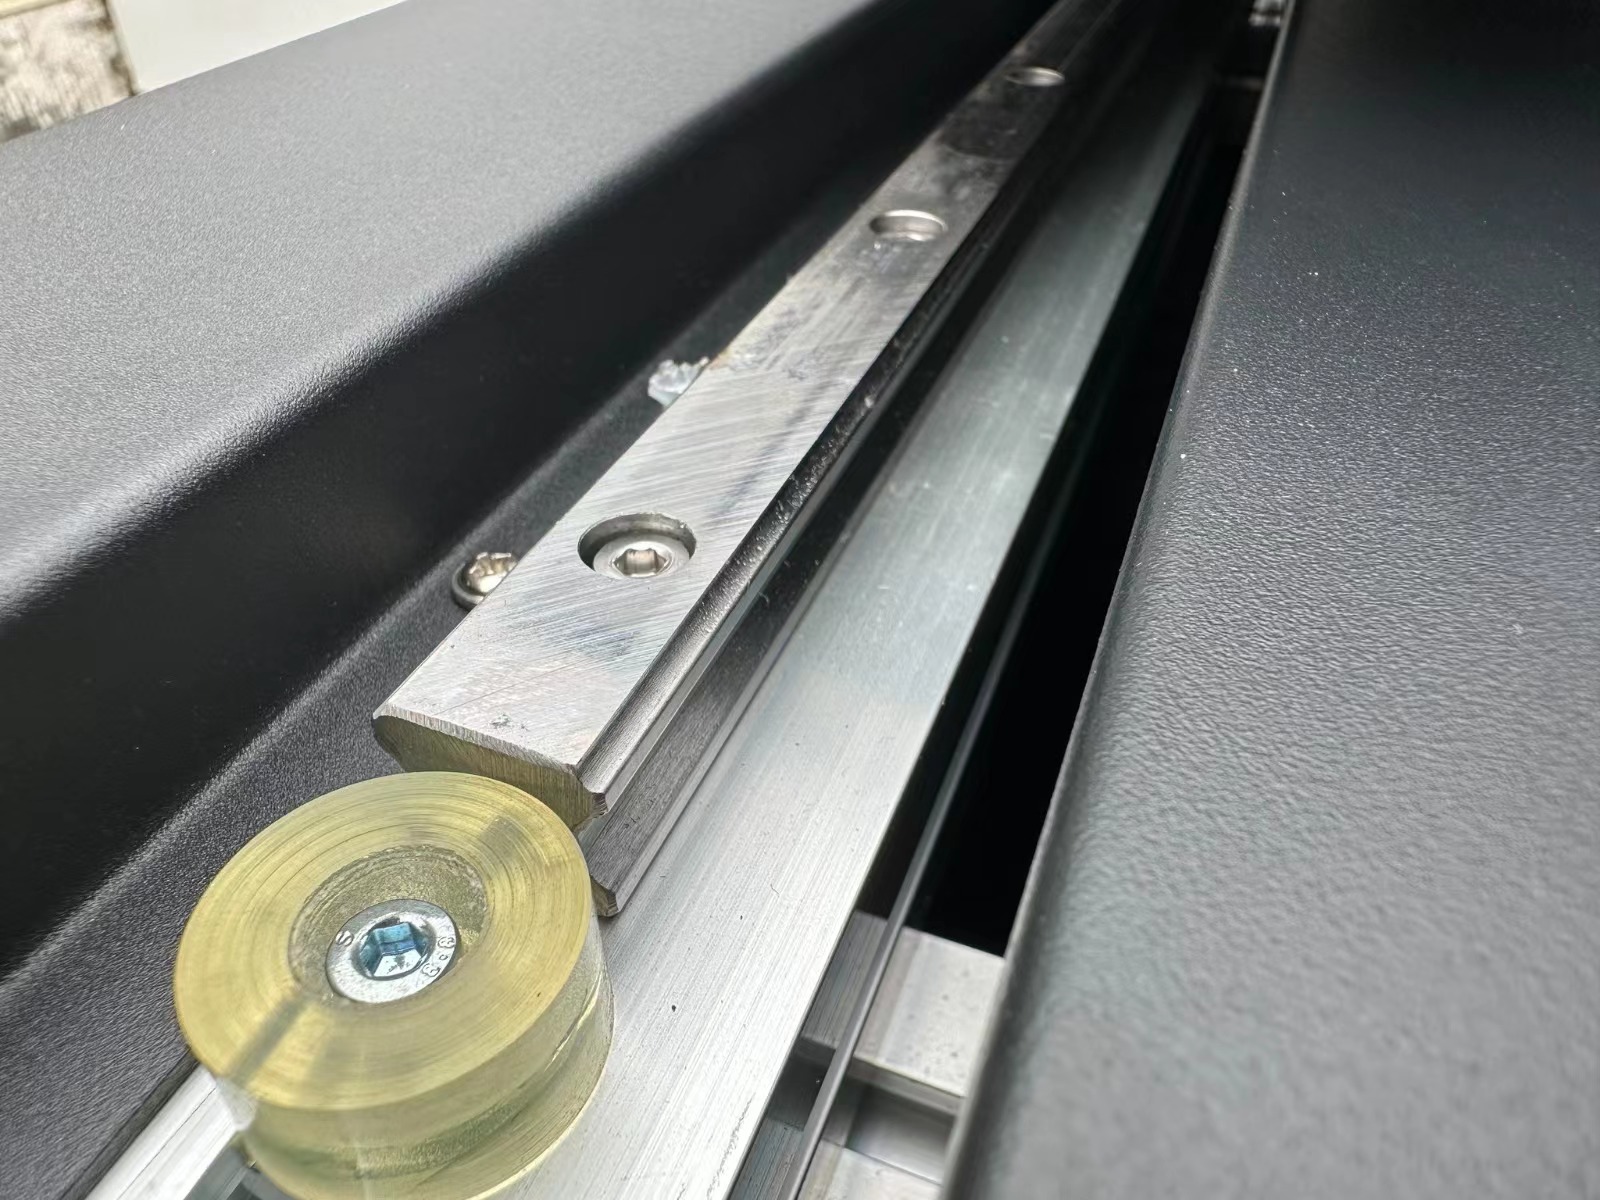
Ứng dụng Máy in phẳng 2 đầu phun XP600 khổ 60cm x 90cm
- CHUYÊN DỤNG IN ỐP LƯNG ĐIỆN THOẠI
- In các chất liệu Gỗ , Meca, Kính, Nhôm , Thép . . .
- Cụ thể : vỏ điện thoại, CD, USB, bút, cốc, chai, bóng golf, thẻ ID, bảng chỉ dẫn, acrylic, bảng xốp PVC, bảng nhôm, thủy tinh, gốm, gỗ, da, v.v., cho tất cả các vật liệu in.
Đến với Bảo Tín bạn an tâm về chất lượng hàng hóa, giá cả và được hỗ trợ về giải pháp in ấn thông qua hotline 0906 726 554, đặc biệt bạn có thể mua hàng với nhiều hình thức sau:
- Đặt hàng trực tiếp qua số hotline : 0906 726 554 (Zalo, SMS) - 0983 726 554 (Zalo, SMS)
- Đặt hàng trực tiếp trên facebook: https://www.facebook.com/baotin.mucin
- Đặt hàng qua sendo: https://www.sendo.vn/shop/mucinbaotin
- Đặt hàng qua shopee: https://shopee.vn/cisbaotin
- Đặt hàng qua lazada: https://www.lazada.vn/shop/cisbaotin-1593763623/
- Tới trực tiếp cửa hàng tại : 264C Lê Văn Sỹ, Phường 14, Quận 3, Tp.HCM
Hình thức thanh toán linh hoạt:
- Thanh toán bằng tiền mặt tại cửa hàng
- Thanh toán qua thẻ Visa, Master Card, ATM tại cửa hàng
- Thanh toán bằng chuyển khoản qua ngân hàng: Vietcombank, Sacombank, Agribank, Dong a bank, ACB bank.
Hình thức giao hàng:
- Hỗ trợ giao hàng miễn phí với đơn hàng trên 1.000.000đ (các quận nội thành)
Đơn hàng dưới 1.000.000đ thu cước tùy theo khu vực - Hỗ trợ giao ra chành xe (nội thành) đi các tỉnh.
- Hỗ trợ giao hàng thông qua Viettle Post, bưu điện.
HƯỚNG DẪN SỬ DỤNG
1.Computer configuration requirements:
Use I 3 and above CPU, more than 4G running memory, can use WIN7/Win8/Win10 system computers, computers need to have more than 3 USB ports, to have a 3.0 USB port, to uninstall and permanently shut down your computer's antivirus software
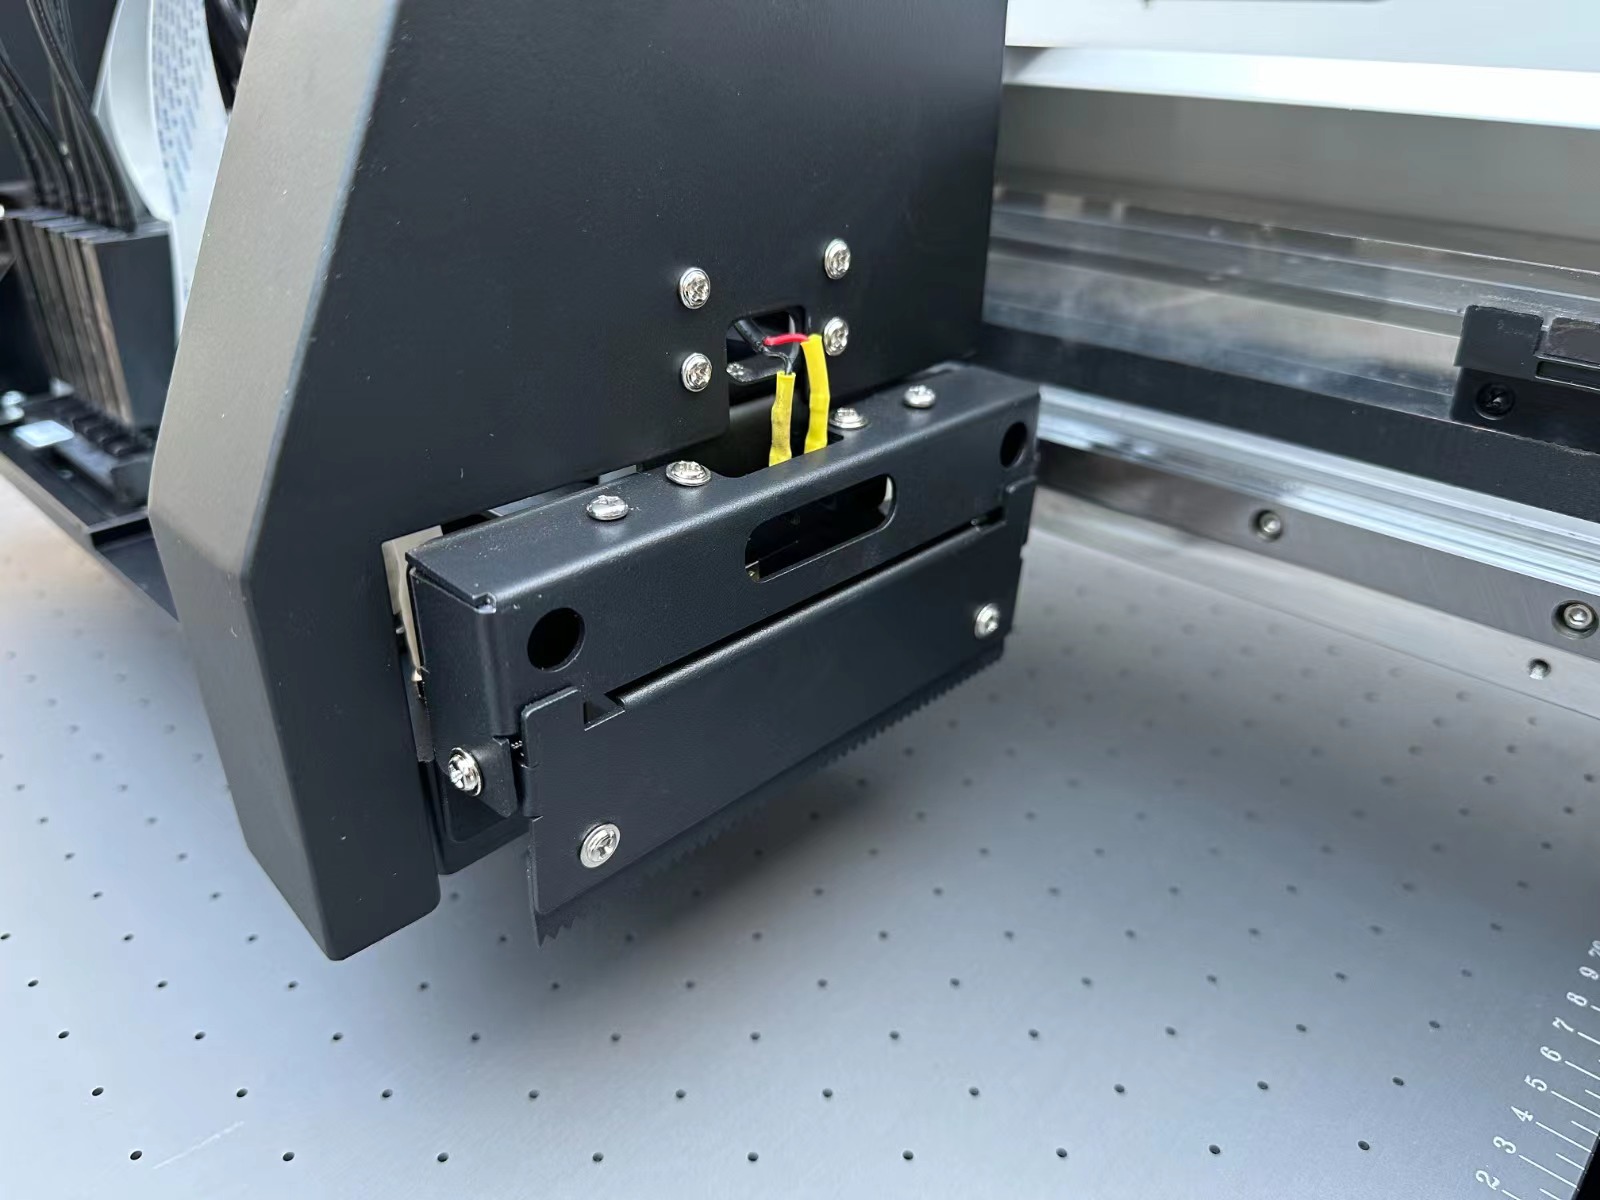
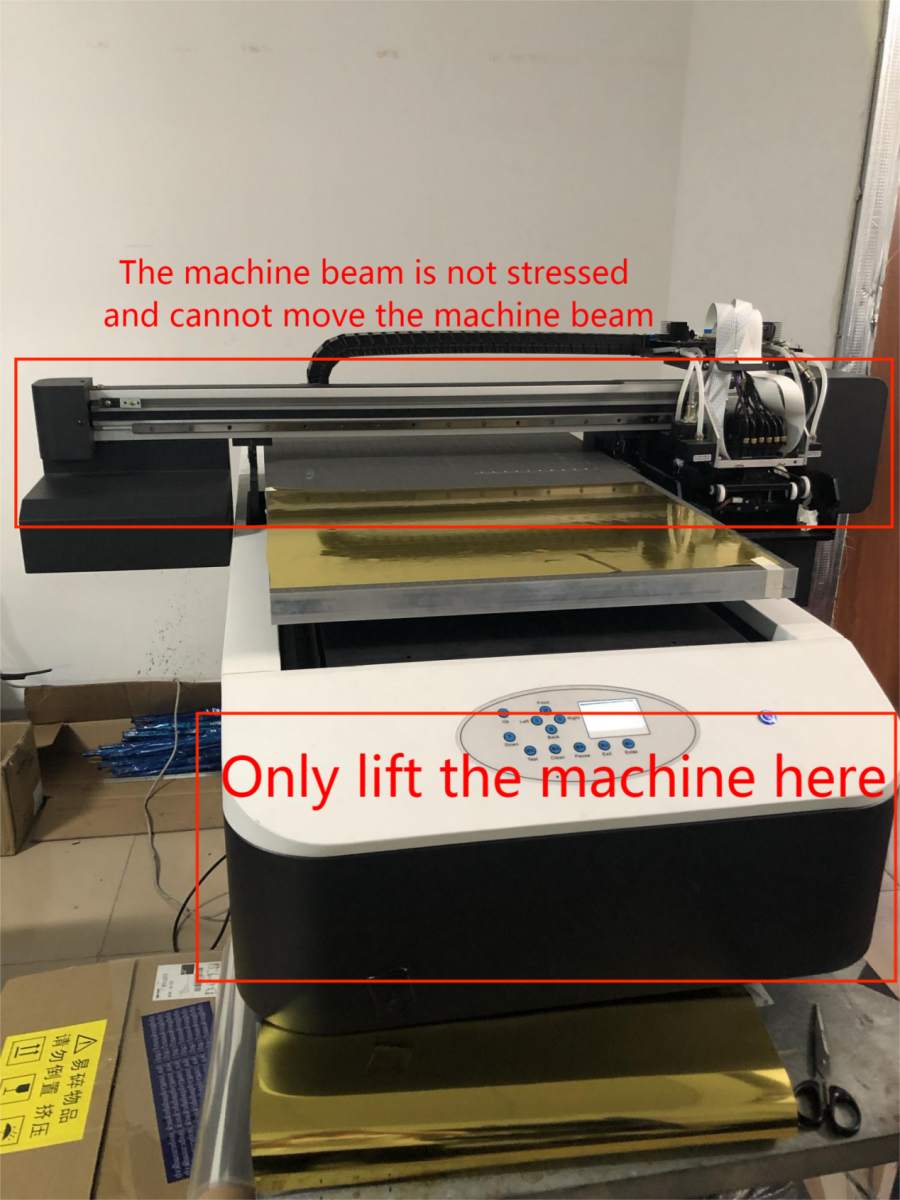
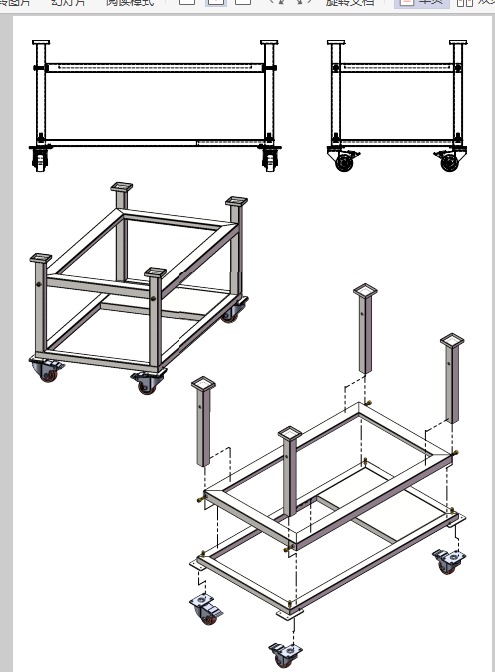
2.Take the machine out of the wooden case and install the tripod.
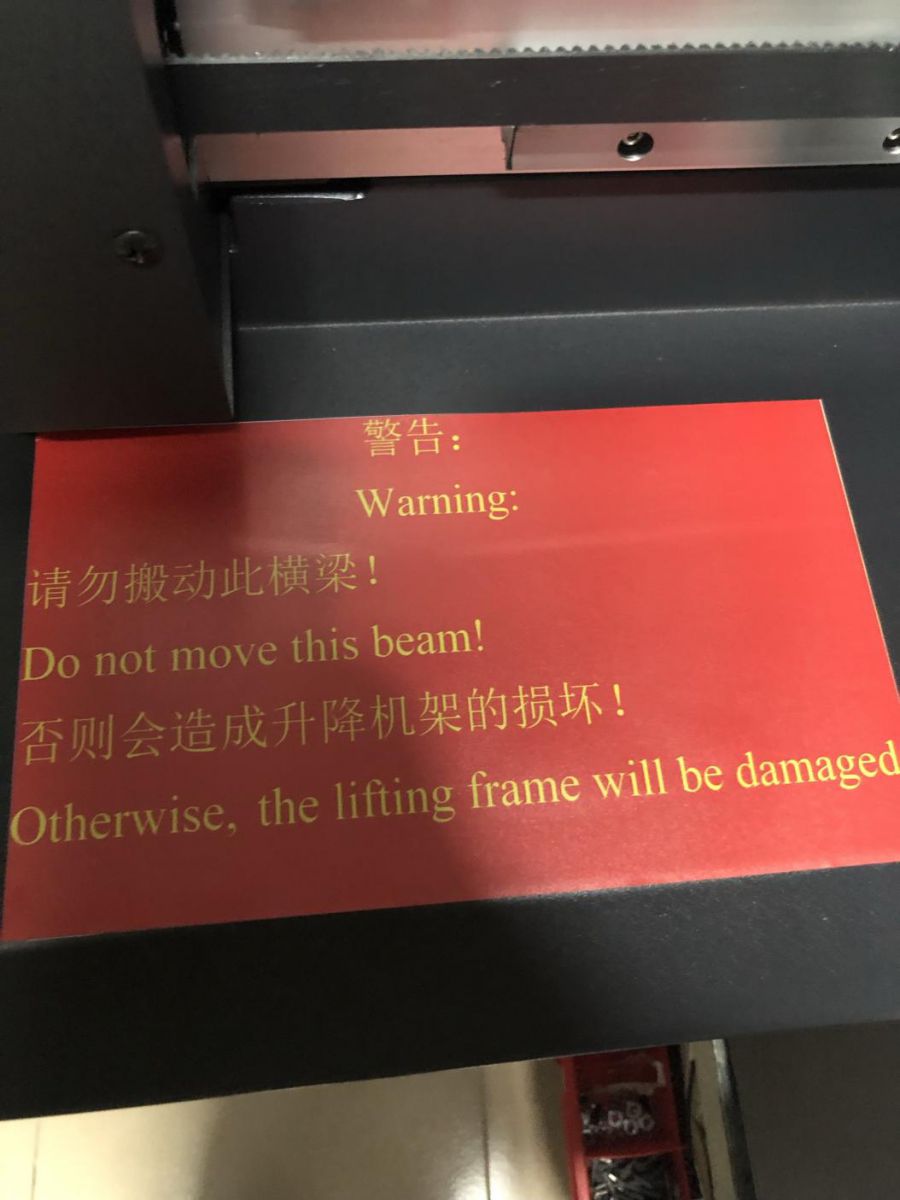
Warning: do not lift the machine beam by hand, or it will cause damage to the machine.
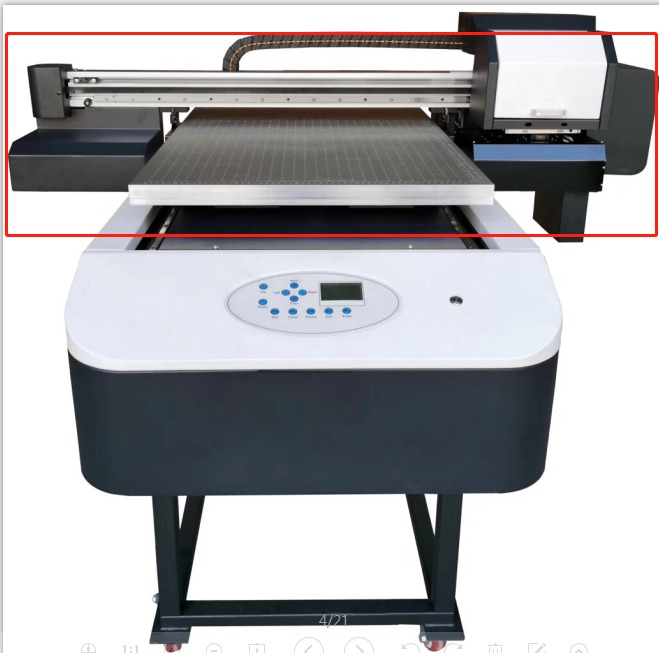
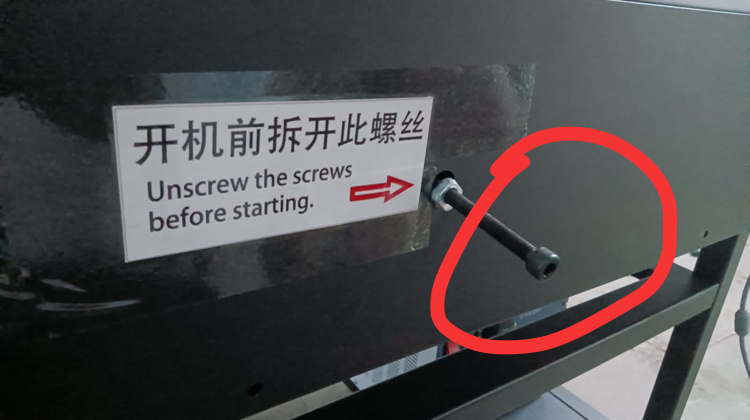
3.Remove the mounting screws from the side of the machine
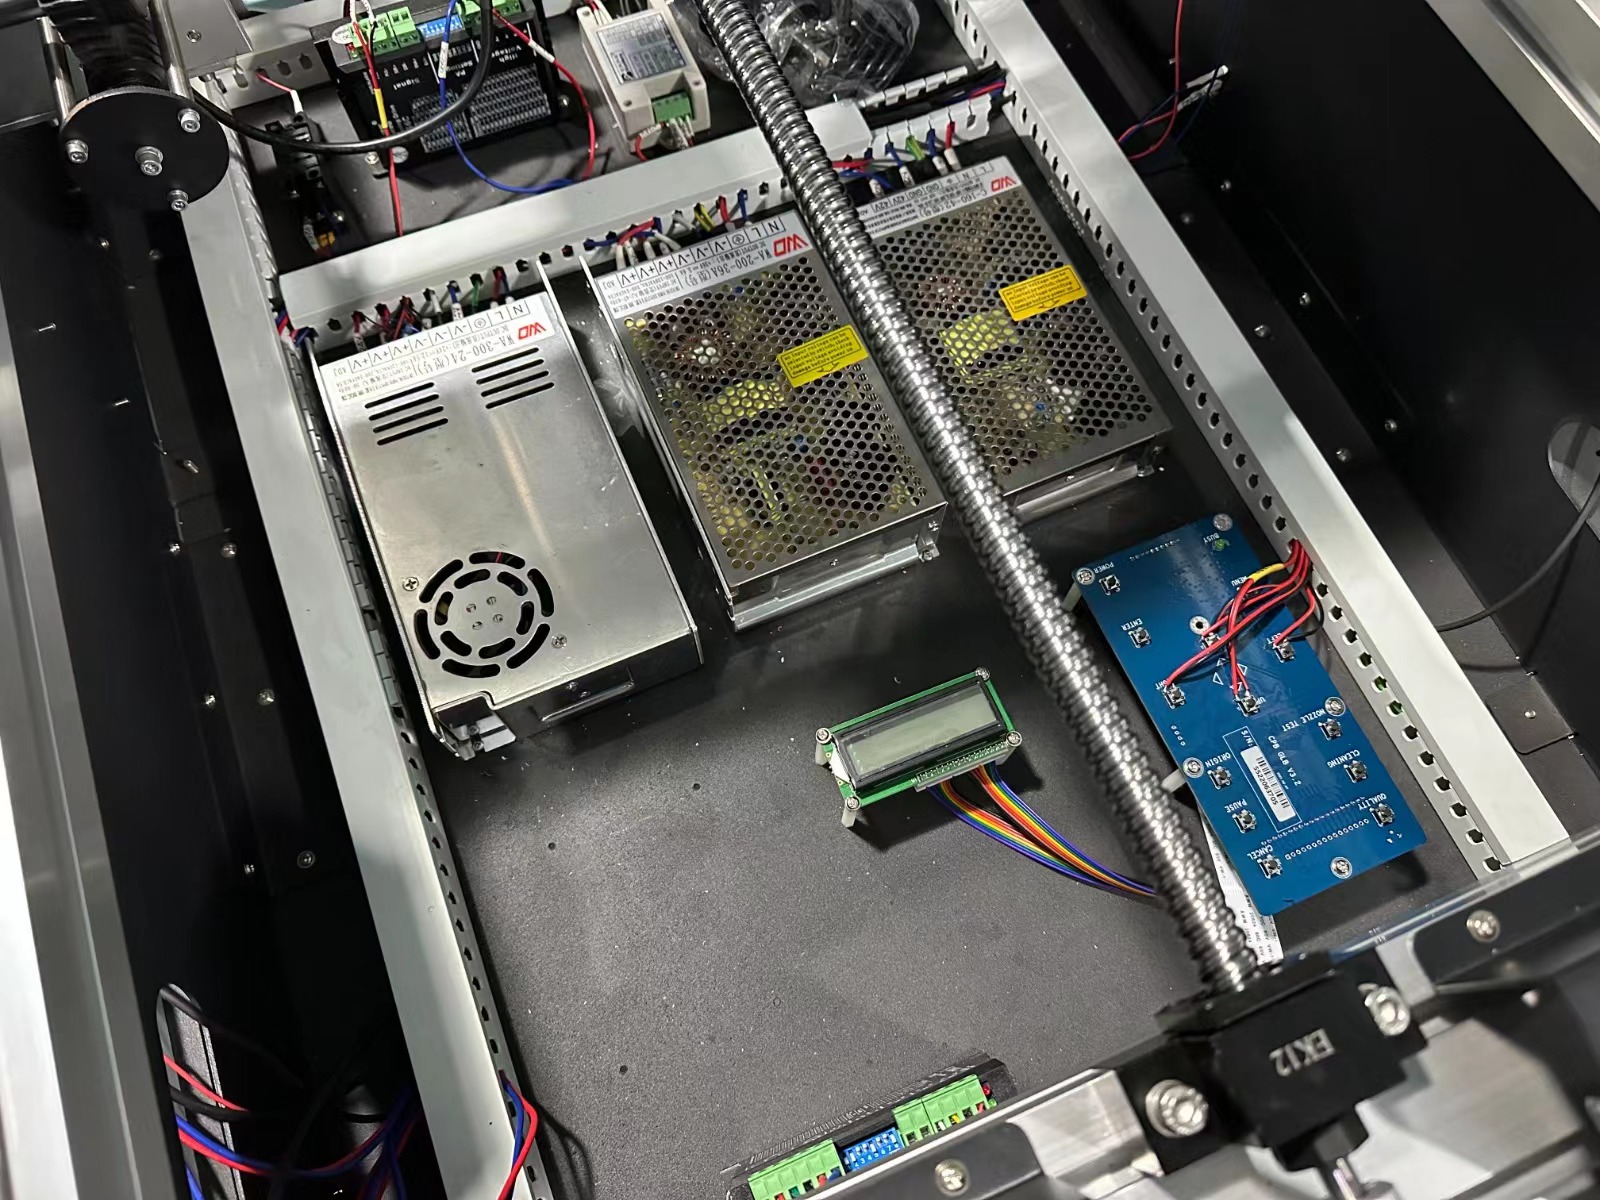
4.Connect the water pipe of the water tank well, connect UV lamp line, then fill the water tank with pure water, water tank for 6 months.
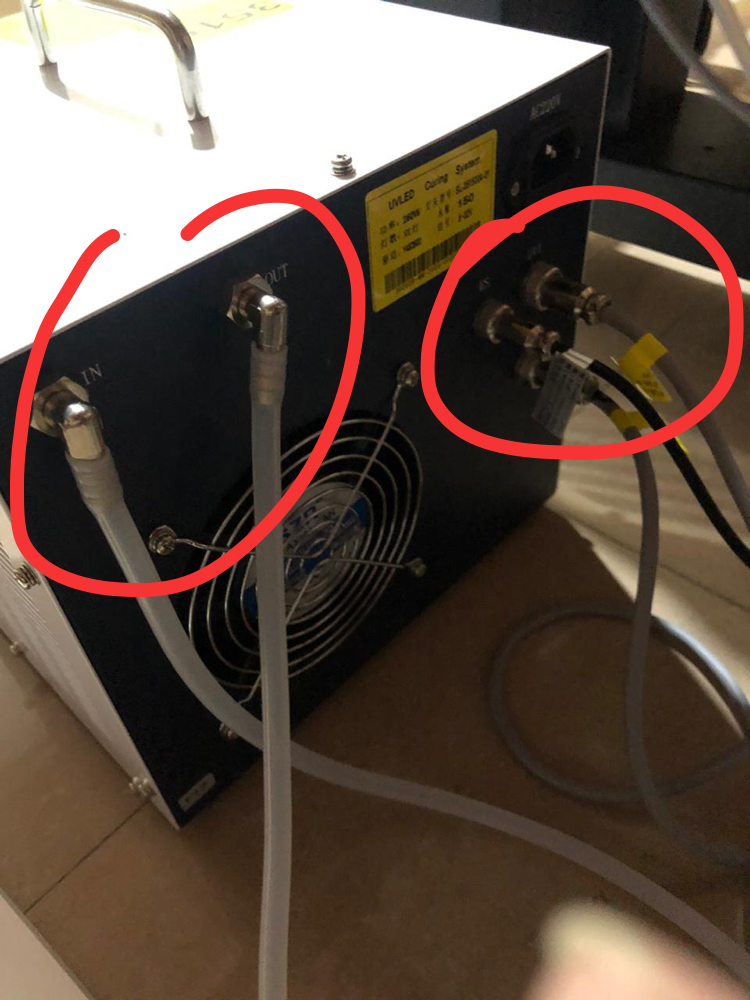
5.Tart the power supply of the water tank, check whether the water tank is working properly, water pipes are not leaking, and then UV1 lamp power to 75, UV2 lamp power to 45.
6.1: Extract the software XP600: 
After the rename, remove the Chinese name, such as: 
Double-click the program to run: 
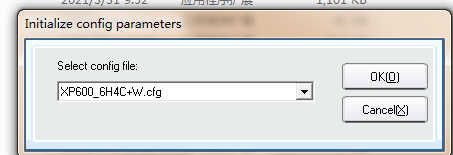
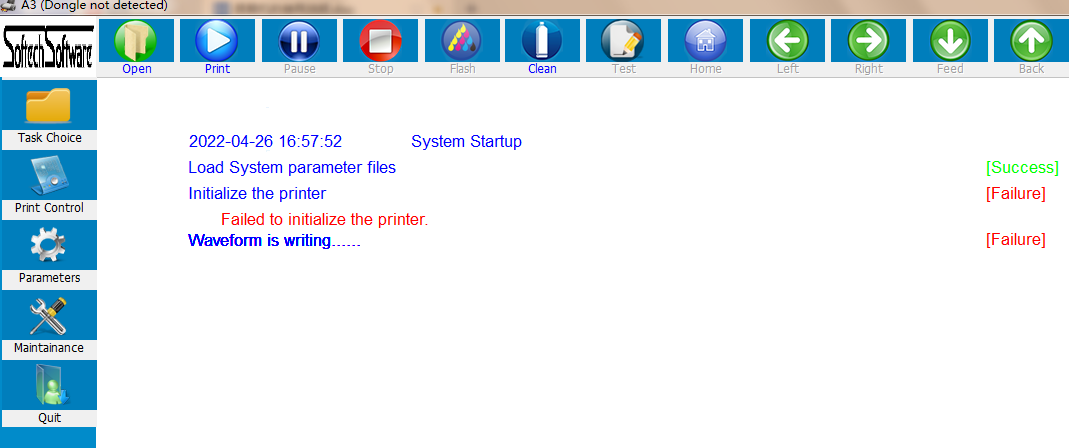
6.2 put in green dongle and blue dongle two computer
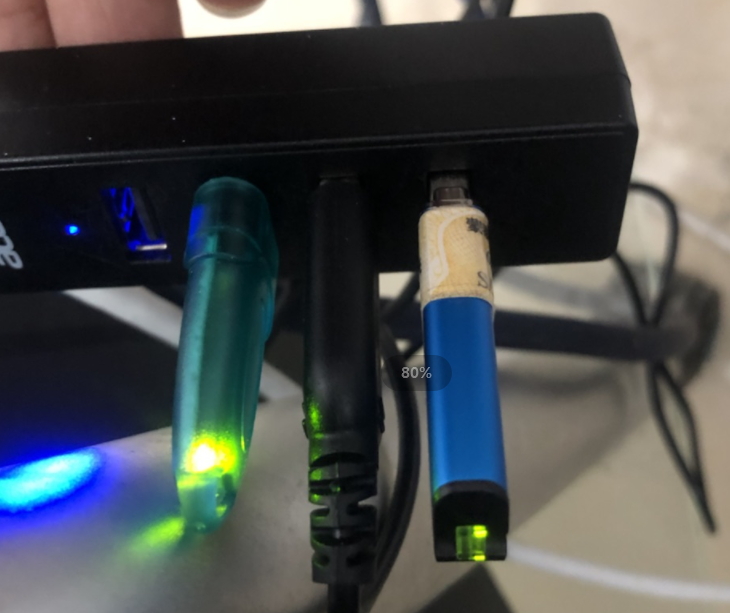
6.3 Install the driver
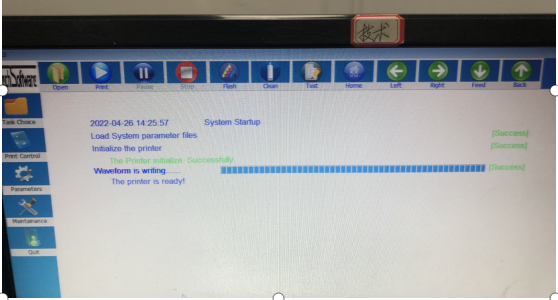
6.4.After the software appears three success, presses the front and back, left and right, up and down direction key, checks the machine movement is normal
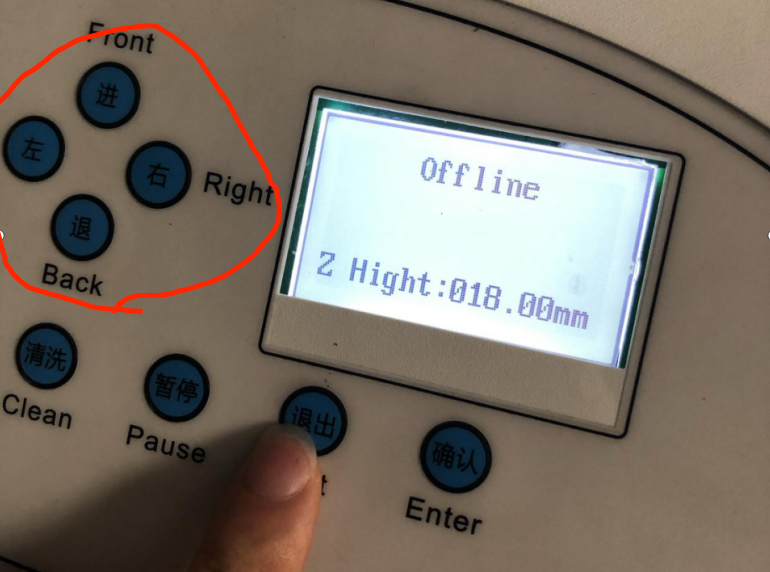
7.After the machine is running normally, install the Maintop Software and set it up to run as Admin
7.1 Install the Maintop printer driver
7.2 Add a picture to the Maintop Software and send it for print test.
8. Machine test is normal after the installation of head , head cable can only be connected in accordance with the way shown below, the only wiring. Head label in the front, head cable must be connected well, otherwise it will burn the head .
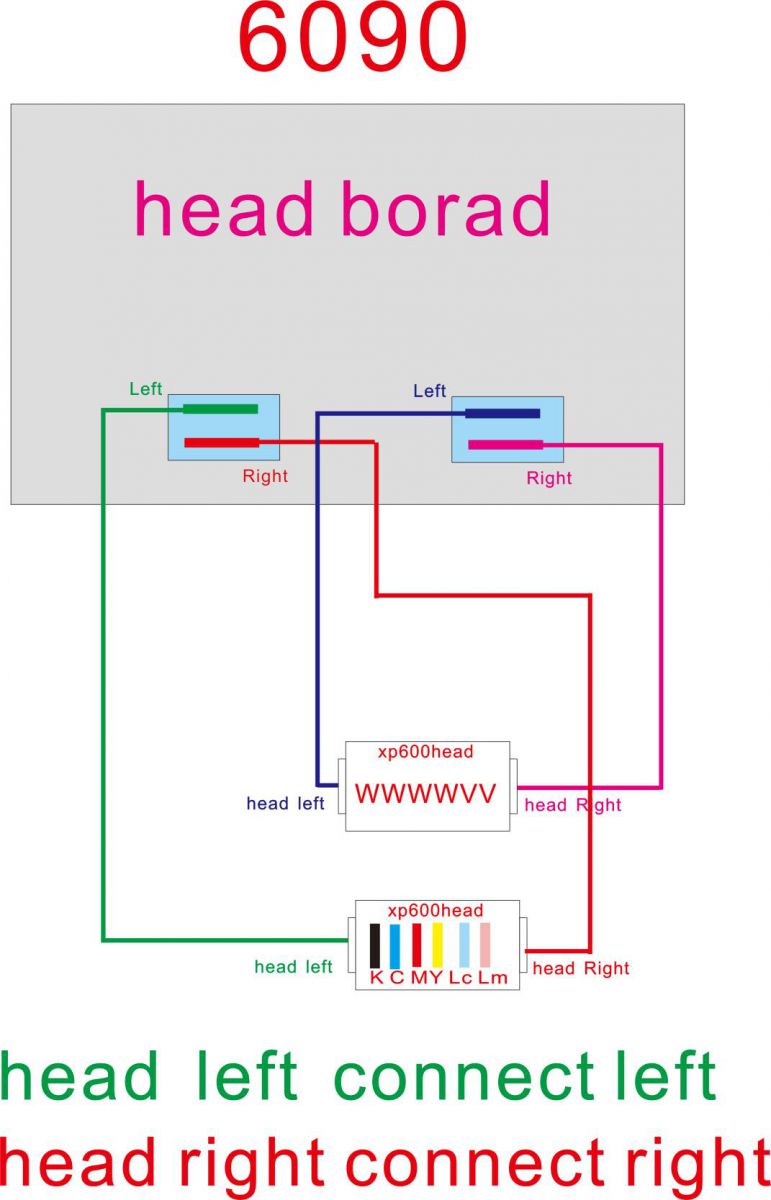
9.1 warning: be sure to check the head cable connection, make sure that the head cable connection is correct, and then turn on the machine power. If the wrong head cable, or head cable is not connected well, ink into the head interface will cause the head or board card burned.
10. Add ink to the ink bottle
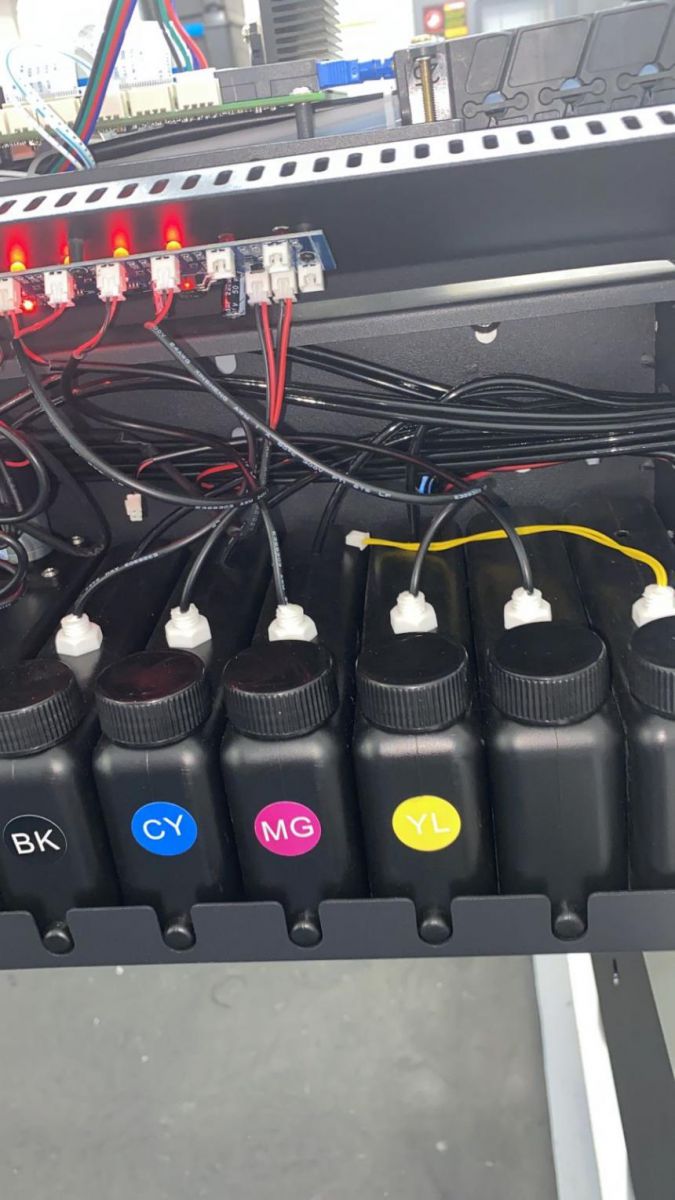
10.1 install the print material. To use flat material, to prevent the head scraping the print material, causing head damage.
10.2 in the machine software menu, select the load-ink, the ink will be pumped to the head here, the ink over, press the exit button to stop the ink.
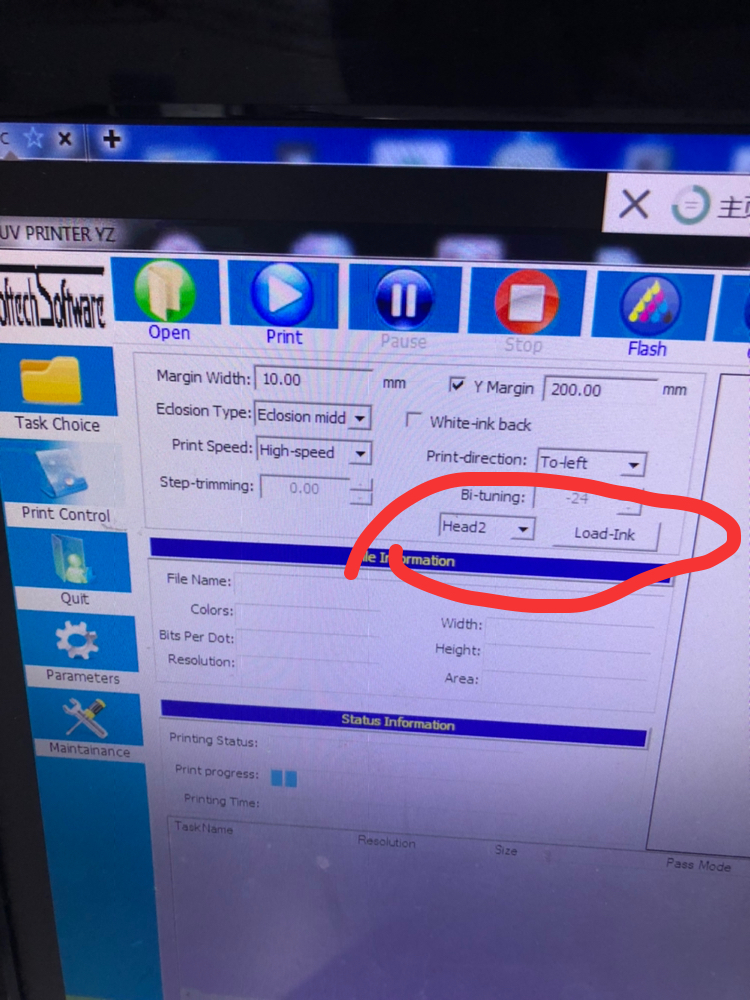
10.3 choose to clean head in the software.
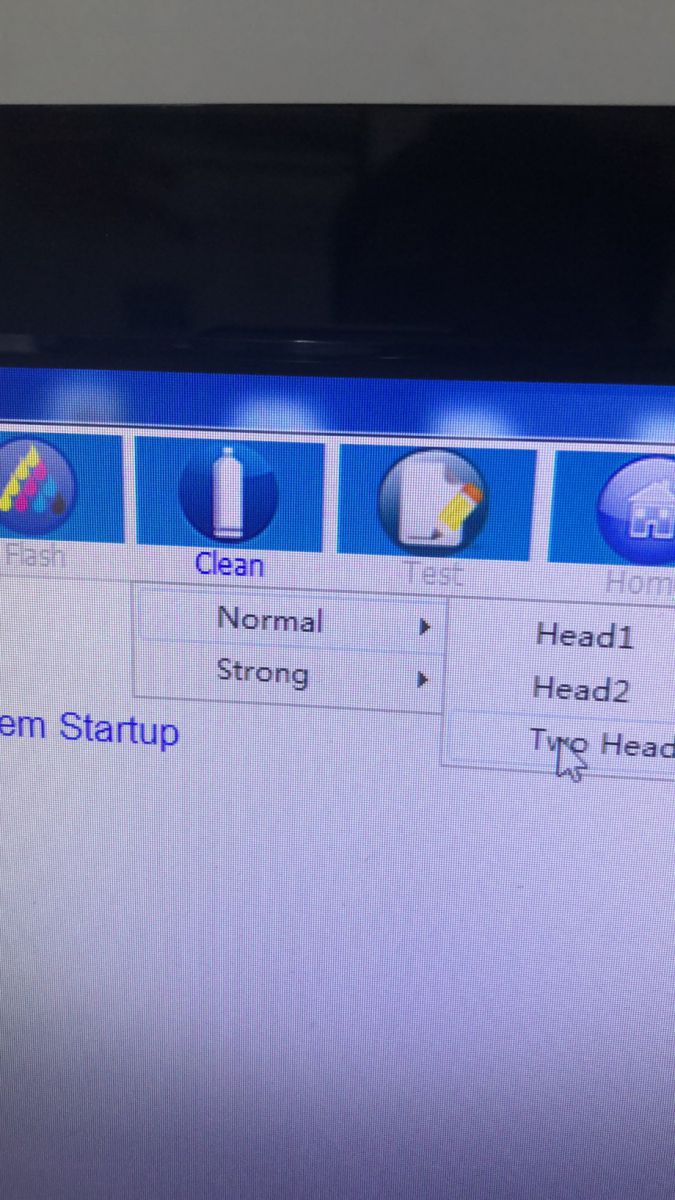
10.4 set the printer origin.
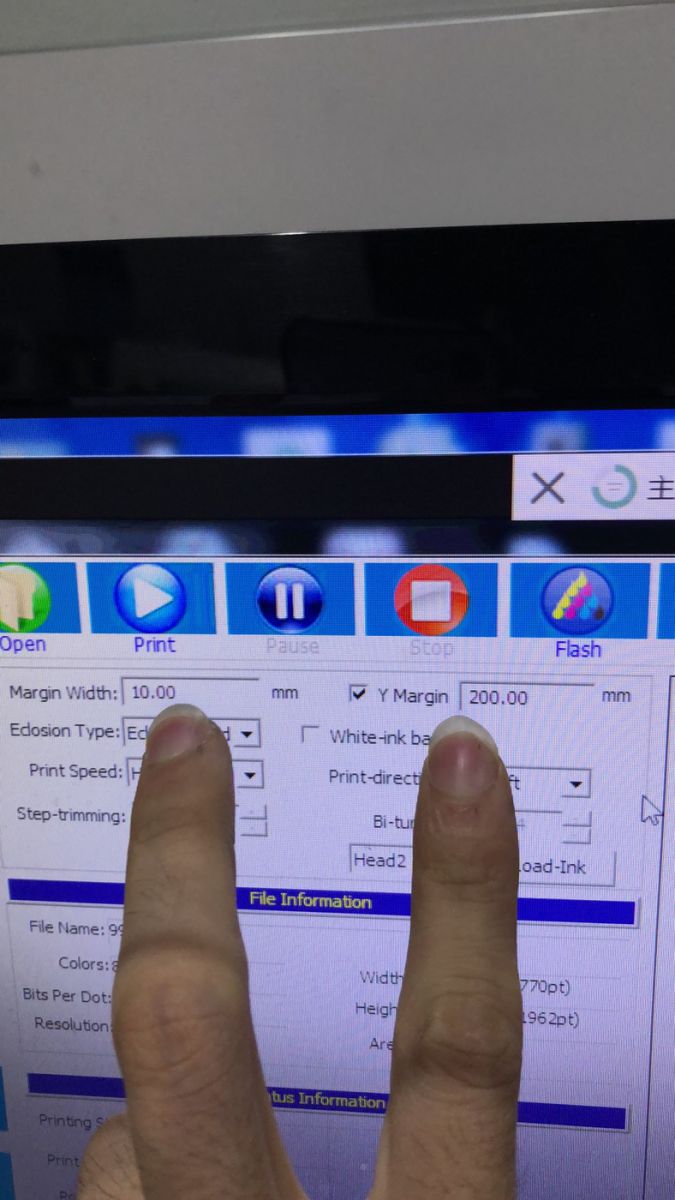
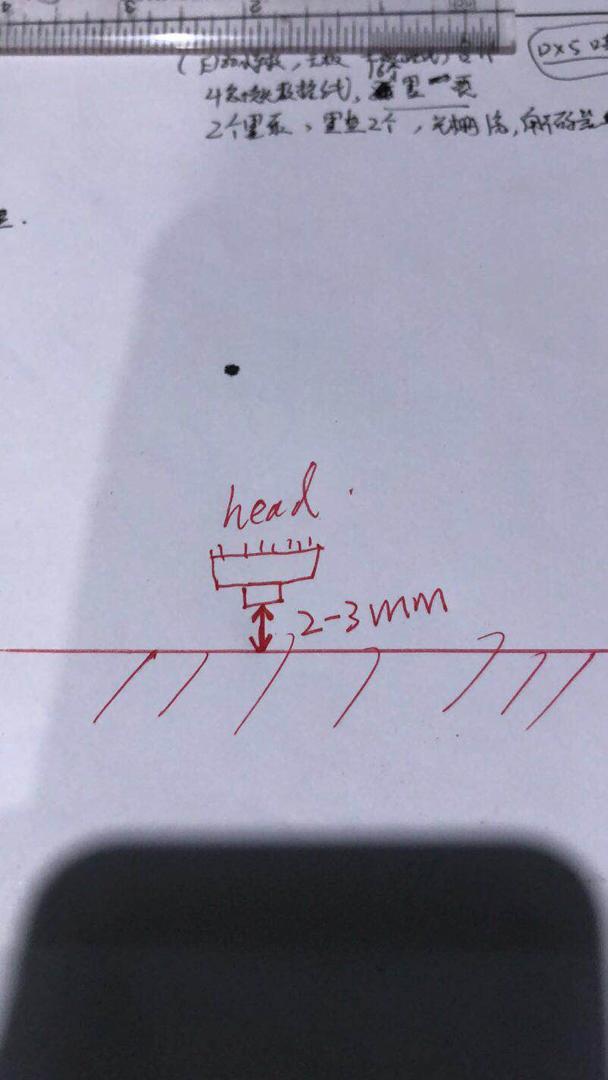
10.5 raise the z axis of the machine, move the left key, move the cart to the printing platform, then control the z key, adjust the height of the nozzle. The surface of the nozzle is 2 to 3 mm from the height of the printed material .
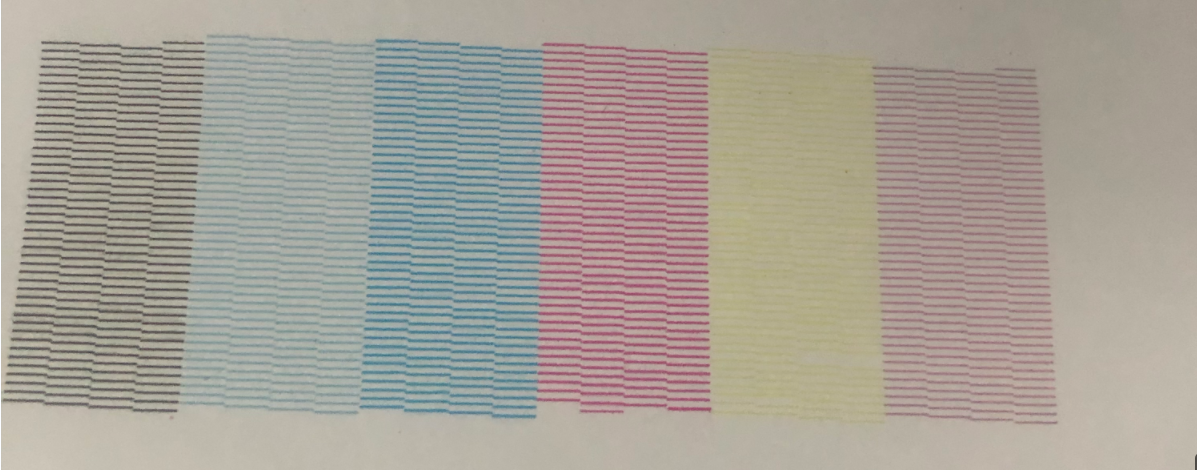
10.6 select print nozzle test in the software.
10.7 in the software advanced option, change the color order. The color order of the ink bag should be the same as in the software. The password is wly1102.
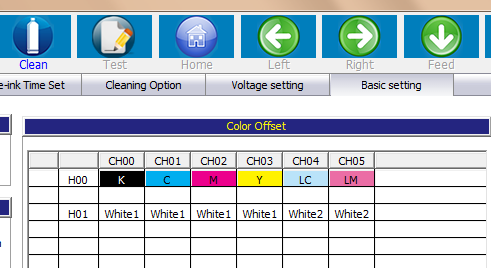
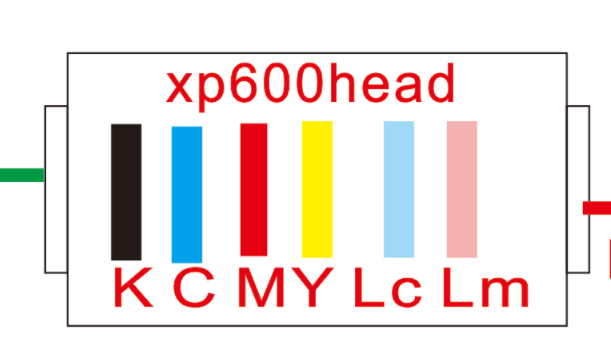
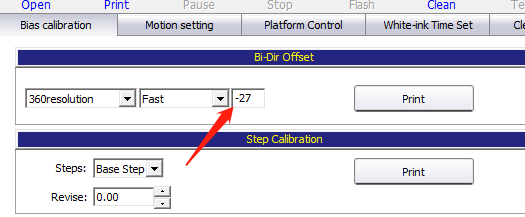
10.8 two-way calibration
10.9 For white and color deviation calibration
White and color pre-and post-calibration here
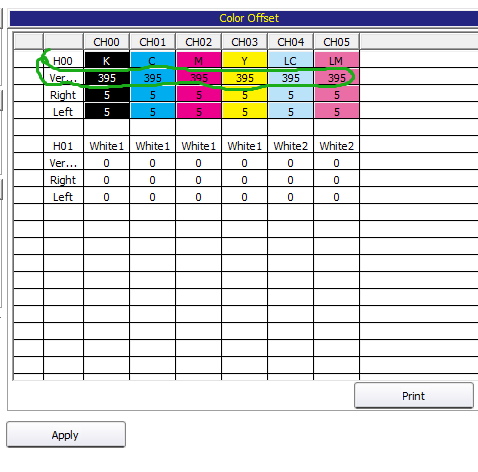
White and color left and right deviation calibration here
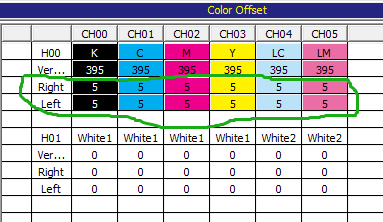
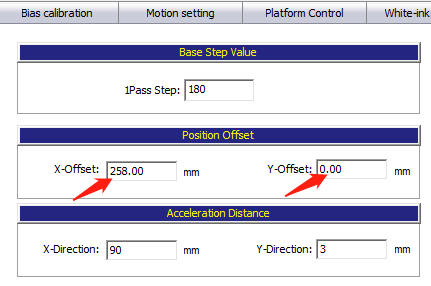
10.10 calibration of origin deviation. The printing starting point is not set as it actually is. Here is the deviation calibration
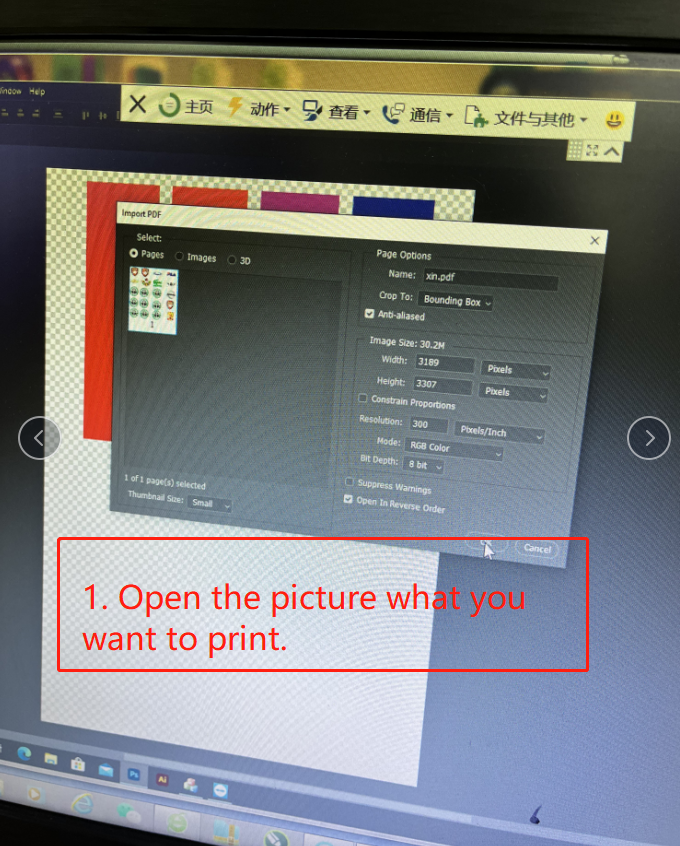
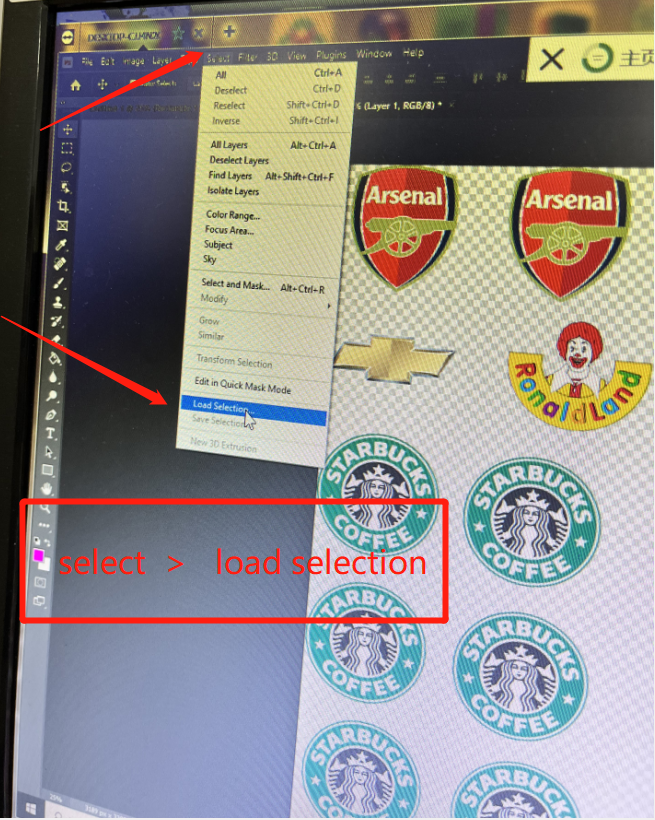
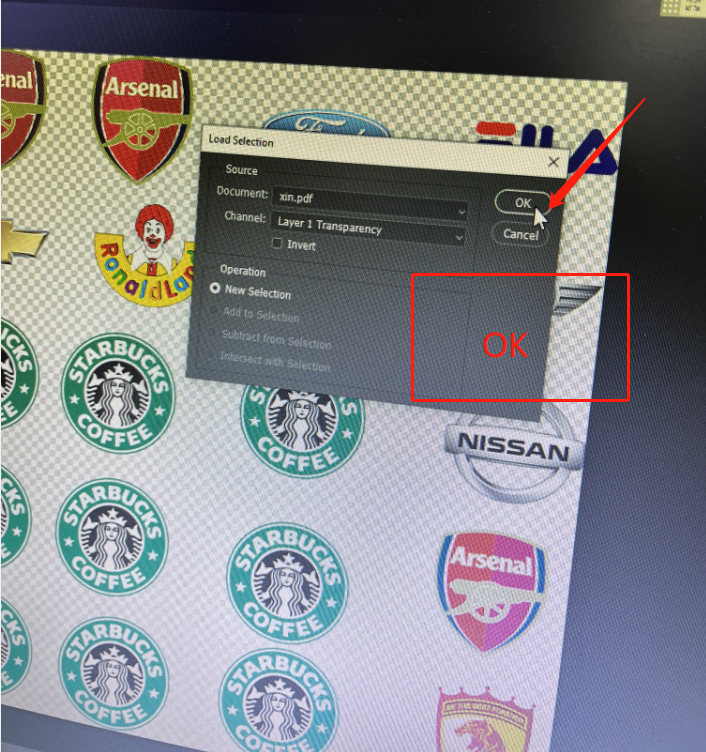
11. Use Photoshop for spot colors
11.1 Open the picture what you want to print.
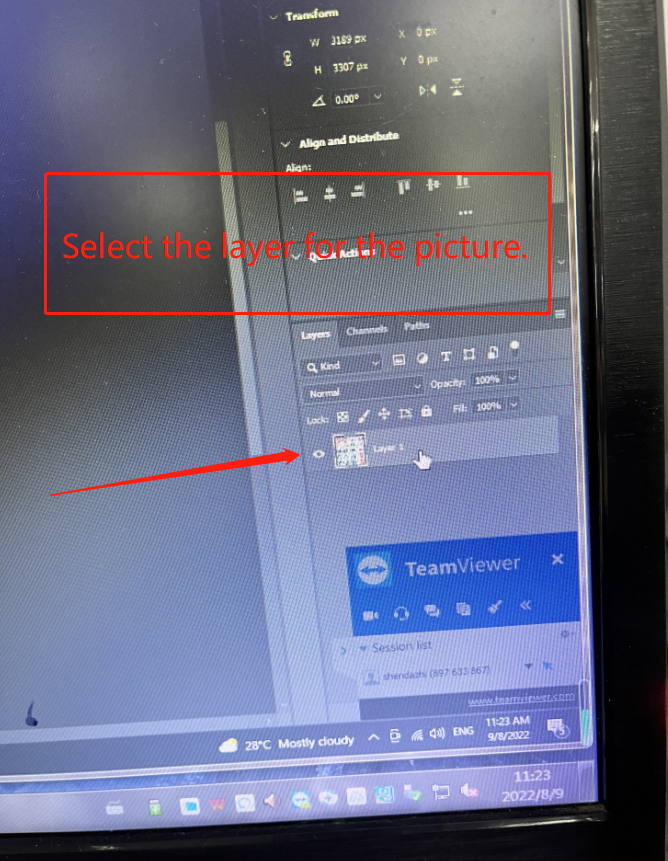
11.2 Select the layer for the picture
11.3 Select -> Load selection
11.4 OK
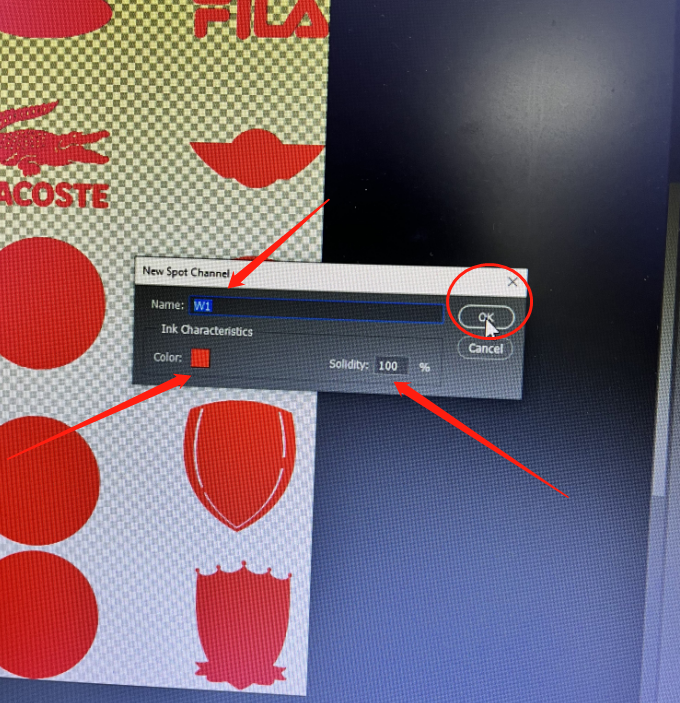
11.5. Channels > New Spot channel
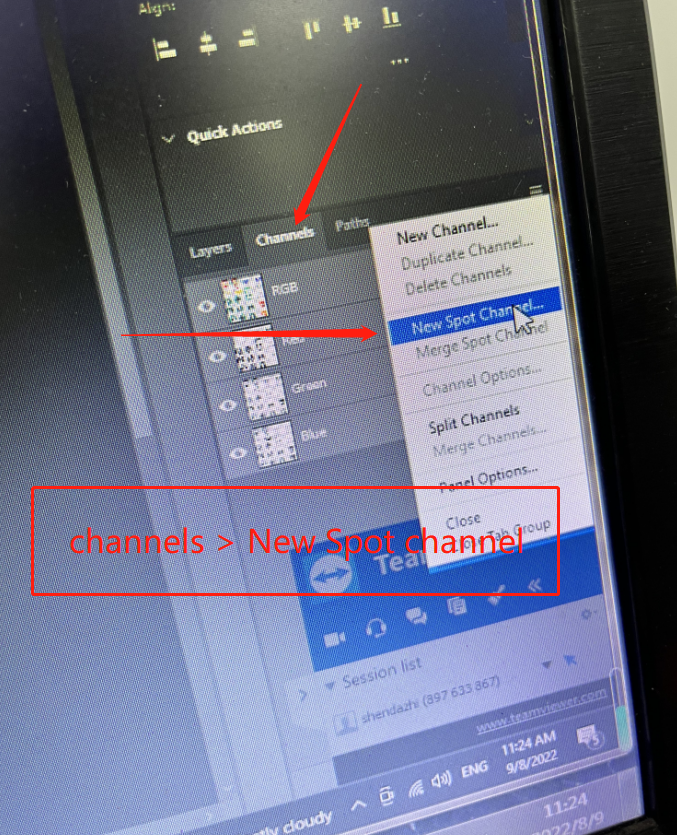
11.6 Name:W1 color: red solidity:100%
